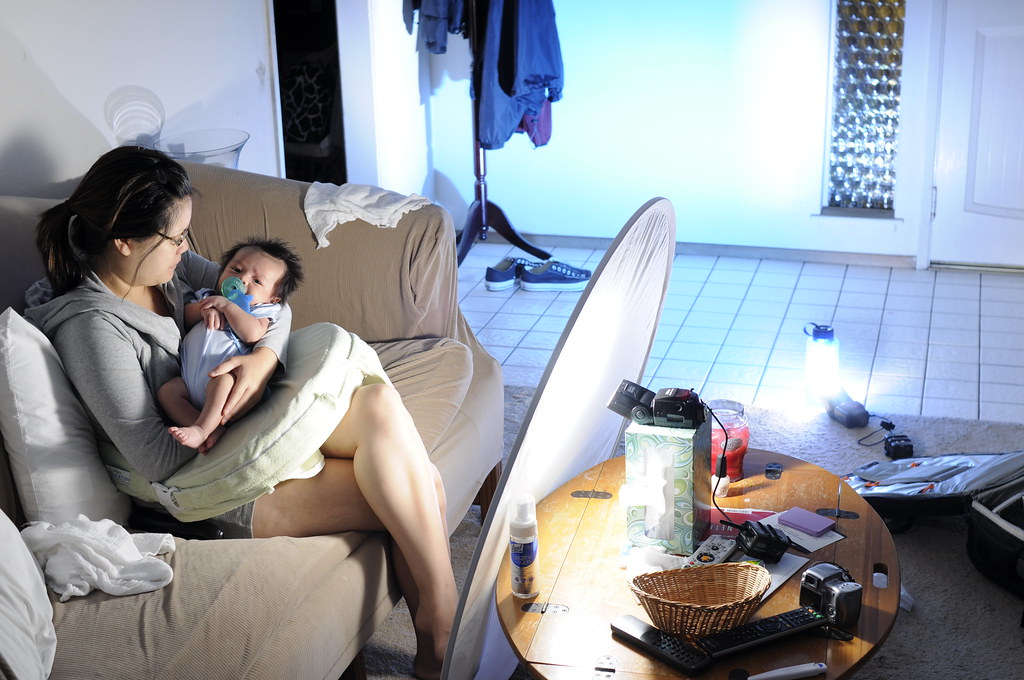
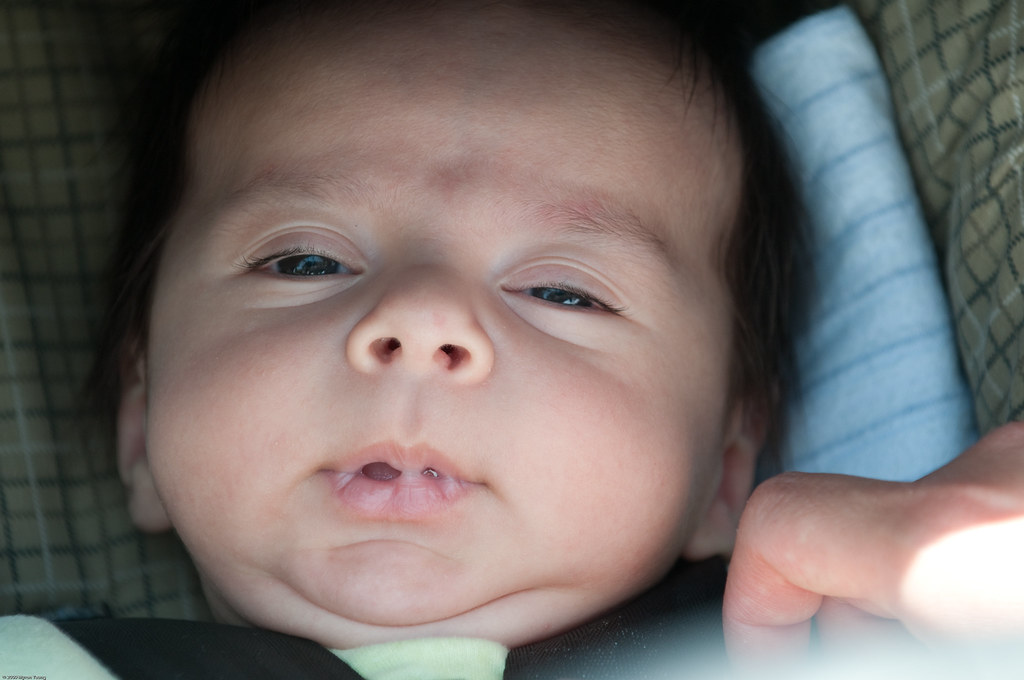
I have a brand spanking new nephew! His name is Jacob and he and his mom (my sister) are doing great. I got a chance to take some photos of him this morning at the hospital. I didn't want to use flash, because Jacob's eyes are still sensitive. To make up for the lack of a flash, I chose to use long exposure times over setting my camera to a high ISO, because I didn't want to see a lot of grain in my photos. I also set my shutter mode to high speed continuous release, used window light whenever possible, and steadied myself on anything stable.
 Exposure:
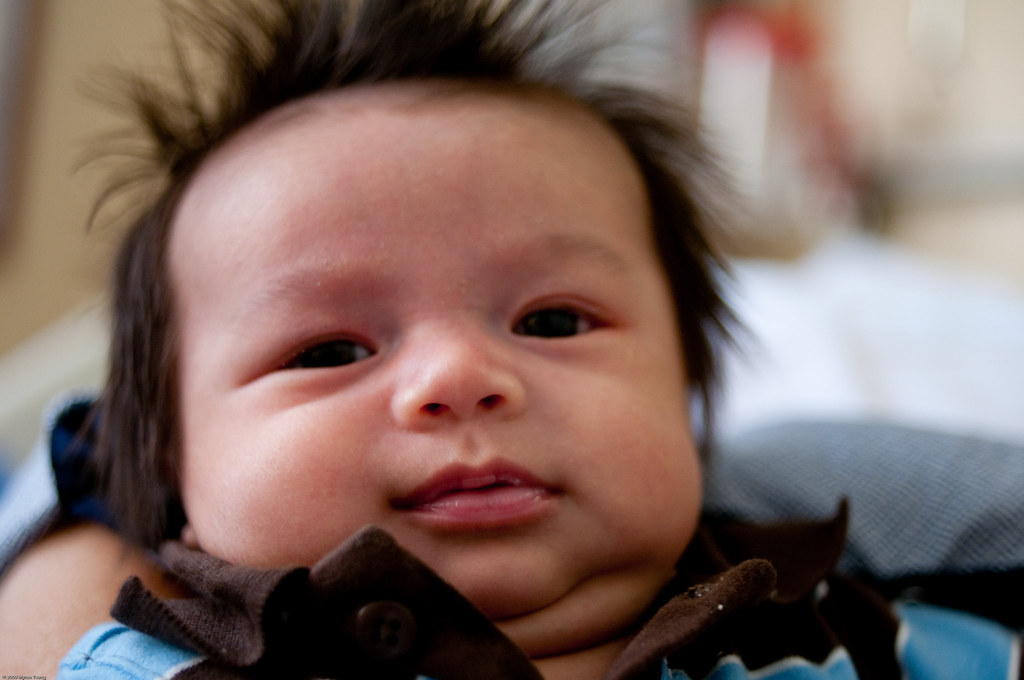
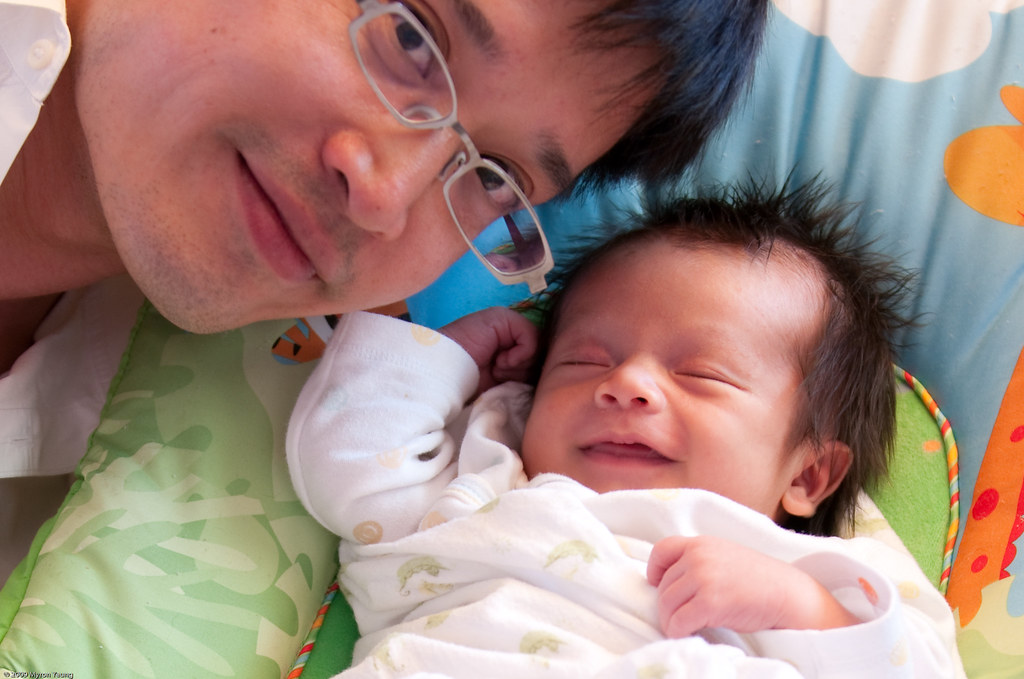
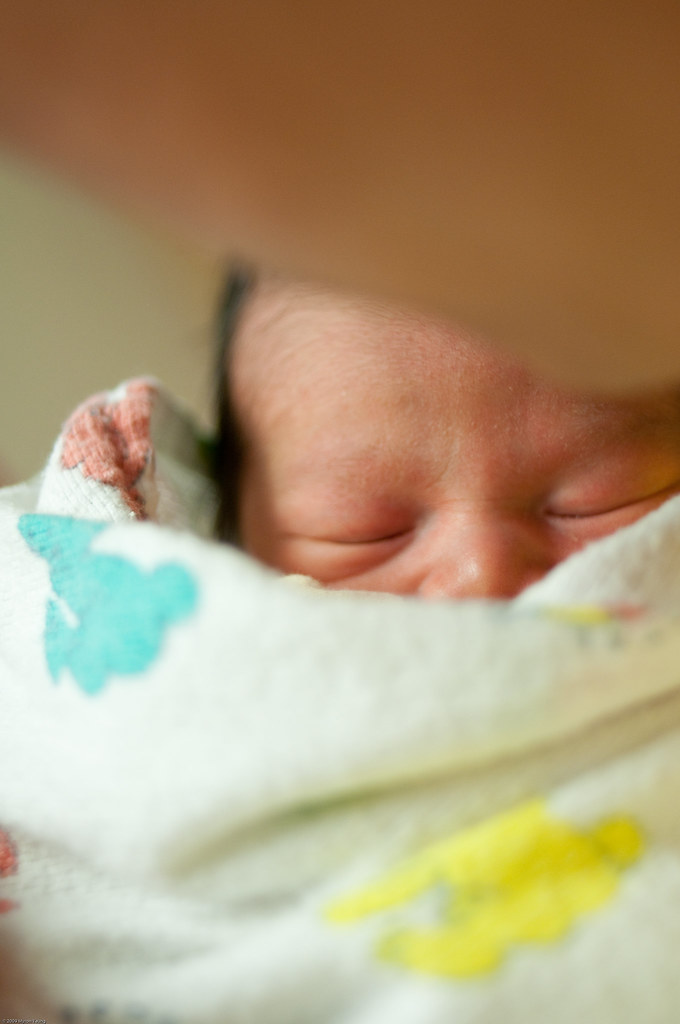
 52.5mm focal length, 1/20 sec, f/5.6, ISO 200, 10:00am.
Post-processing in Lightroom: Cropped, increased fill light, reduced color temperature.
To avoid camera shake, I never set the exposure time longer than 1/50th sec when handholding my camera, because my lens has an effective focal length of 52.5mm. When I wanted to increase my exposure time to around 1/20th sec, I put my camera on a tripod and used the tripod like a monopod. By supporting my camera in this way, I reduced a lot of camera shake.
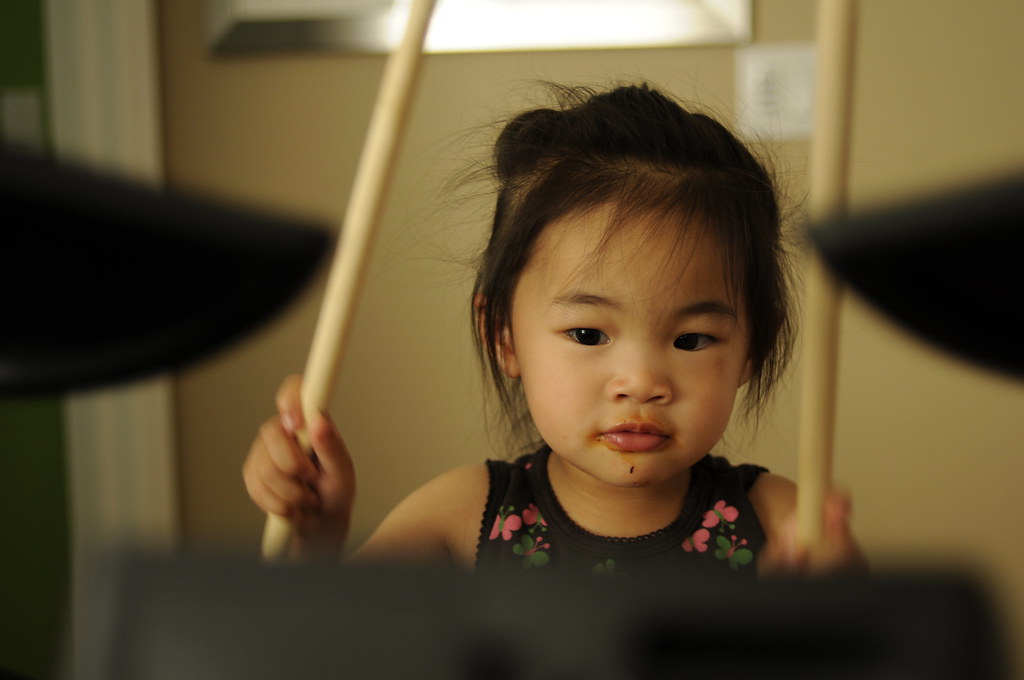
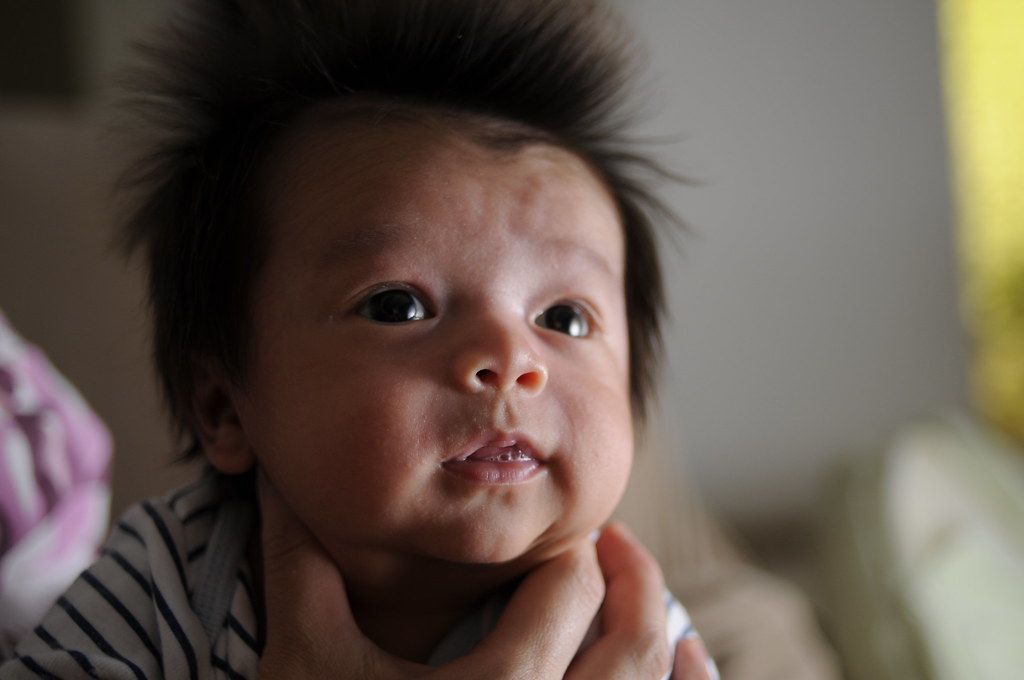
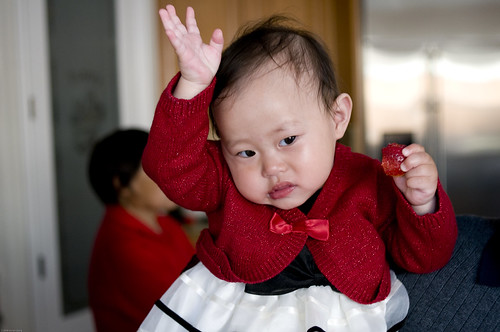
 Exposure:
 52.5mm focal length, 1/320 sec, f/2, ISO 400, 10:27am.
Post-processing in Lightroom: Increased exposure and fill light, reduced color temperature.
I took many rapid fire bursts hoping that the middle shots in each sequence exhibited less blur, due to them not being affected by the movement of pressing and letting go of the shutter release. The only drawback was the loud sound made by the shutter and mirror moving with each shot. It may have bothered Jacob, although he never appeared to be irritated by it.
I also took advantage of the light streaming through the large window. My sister's bed was on the far side of the room, so very little sunlight reached her. But whenever someone held Jacob near the window, I had a lot more light to work with.
Lastly, I braced myself on whatever and whoever was near me. My brother's shoulder made a great platform to shoot from!
You can see all the photos from our happy day
here.
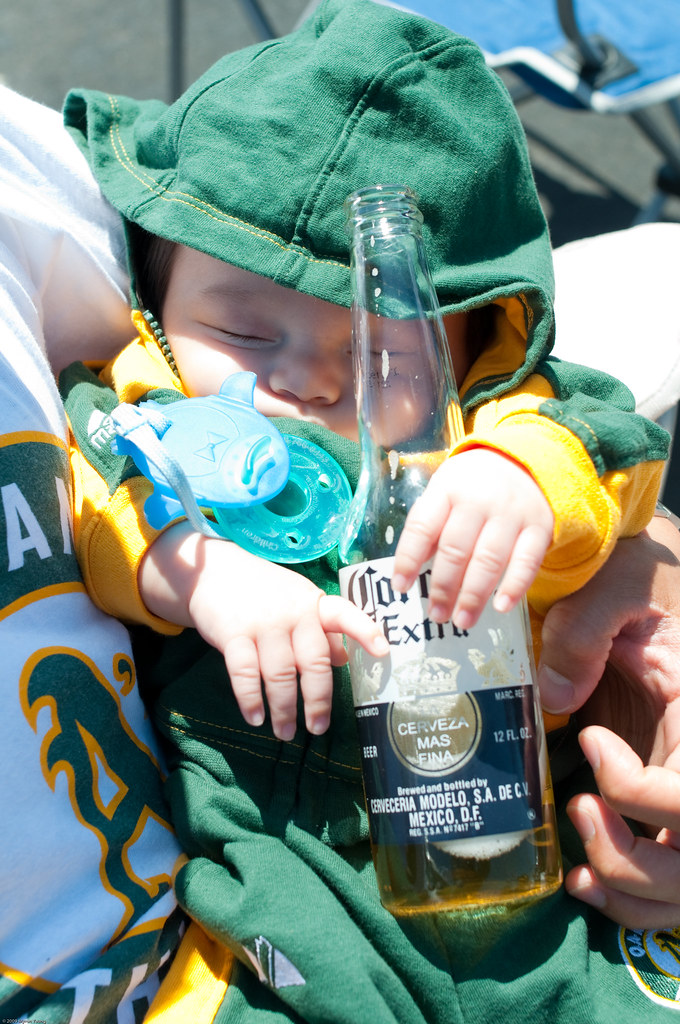 Should photography always be a force for good? Probably. But come on, who could resist doing this to their baby nephew? :-)