 Though I wrote about overcoming squintiness in the sun, I didn't follow my own advice. As you can tell from the shadow across my neck, the sun was up high with no cloud or shade to protect my eyes. I'm squinting like I'm reading my camera's manual without glasses! In my defense, I was with my family paying our respects to my grandfather, so I couldn't exactly pop out the reflector and make a big production.
My uncle was smart: he wore sunglasses.
Though I wrote about overcoming squintiness in the sun, I didn't follow my own advice. As you can tell from the shadow across my neck, the sun was up high with no cloud or shade to protect my eyes. I'm squinting like I'm reading my camera's manual without glasses! In my defense, I was with my family paying our respects to my grandfather, so I couldn't exactly pop out the reflector and make a big production.
My uncle was smart: he wore sunglasses.Friday, April 24, 2009
More Squintiness
Though I wrote about overcoming squintiness in the sun, I didn't follow my own advice. As you can tell from the shadow across my neck, the sun was up high with no cloud or shade to protect my eyes. I'm squinting like I'm reading my camera's manual without glasses! In my defense, I was with my family paying our respects to my grandfather, so I couldn't exactly pop out the reflector and make a big production.
My uncle was smart: he wore sunglasses.Thursday, April 23, 2009
Twilight Revisited: Another Team Effort
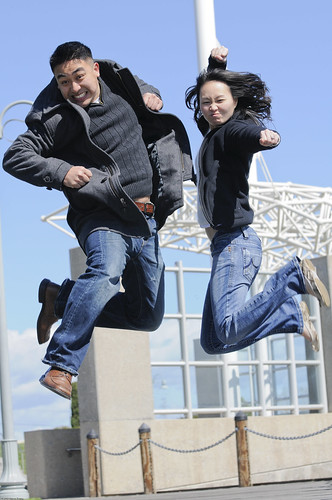
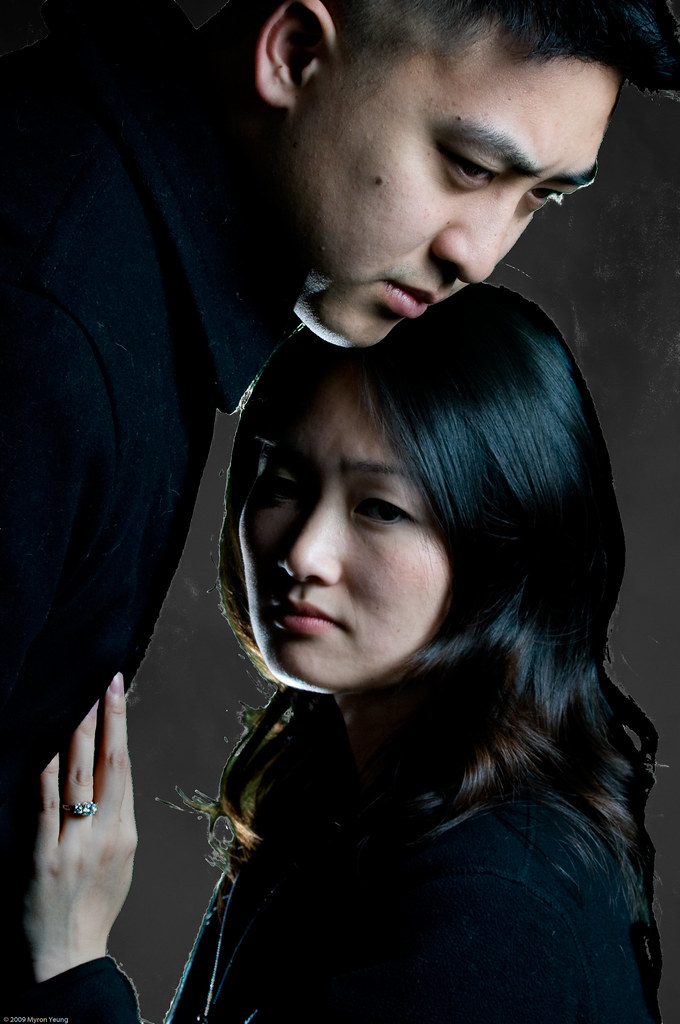 I wasn't satisfied with my first Twilight attempt featuring Judy and Burgess, so a few weeks later we tried it again. This time we replicated a different pose. Unlike the first photo, Judy and Burgess were shot at once which made post-processing a lot simpler, but it also presented some challenges.
 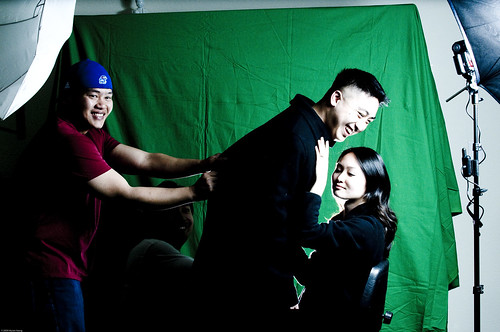 As you can see from the setup shot, it took a team to put this shot together. First, notice the nice rim lighting around Judy's face and Burgess's chin. It was Brian's idea and it looks great! It separates them nicely from the background. So how did we do it? Brian hid behind Burgess and pointed a bare flash at Judy's face. Another problem was Burgess kept falling over onto Judy, so Jason stepped in and held onto Burgess while he leaned forward.
Sometimes pressing the shutter release button is just a small part of the imagemaking process!
Here are the rest of the photos from that evening.
As you can see from the setup shot, it took a team to put this shot together. First, notice the nice rim lighting around Judy's face and Burgess's chin. It was Brian's idea and it looks great! It separates them nicely from the background. So how did we do it? Brian hid behind Burgess and pointed a bare flash at Judy's face. Another problem was Burgess kept falling over onto Judy, so Jason stepped in and held onto Burgess while he leaned forward.
Sometimes pressing the shutter release button is just a small part of the imagemaking process!
Here are the rest of the photos from that evening.Have Fun, Be Silly
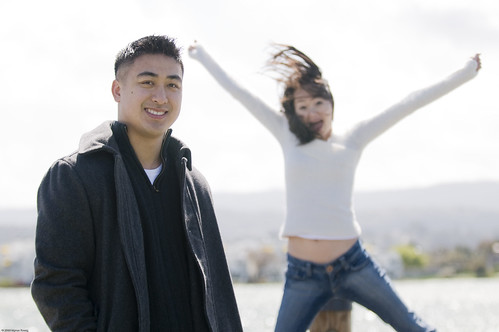
 I love playing around with photos to create something ridiculous. Around the time I took this photo, I had just watched Planet B-Boy, a documentary about the annual world breakdancing championship in Germany. I had breakdancing on my mind, so when I saw a low ledge, I asked Amy to push up on it. She thought I wanted to make it look like she was lifting it up. Ha! I knew that with a lot of cropping and a 180 degree rotation, I could make her look like she was doing a fancy handstand!
Lesson Learned: Listen To Your Subject
 I should have paid attention to Amy when she said that this little spot was a great place to take photos. At the time I took the shot, I thought that the very bright sun overhead washed out the details of the concrete structure. Consequently, I did not think it looked like an interesting background.
It wasn't until I got home and examined the photo on my laptop that I realized how much detail I captured of the structure. I should have listened to Amy when I had the chance. I hope she doesn't read this! :-)
You can see the rest of my photos from Ocean Beach here.
I should have paid attention to Amy when she said that this little spot was a great place to take photos. At the time I took the shot, I thought that the very bright sun overhead washed out the details of the concrete structure. Consequently, I did not think it looked like an interesting background.
It wasn't until I got home and examined the photo on my laptop that I realized how much detail I captured of the structure. I should have listened to Amy when I had the chance. I hope she doesn't read this! :-)
You can see the rest of my photos from Ocean Beach here.Lesson Learned: Mind the Squintiness Redux
 In a previous post I mentioned a way to mitigate squintiness on a sunny day:
3. Take a wide shot where they appear small in the photo. Since their faces are small relative to the overall size of the frame, their squintiness is not as noticeable.I was going to write solely about how I applied this rule to my shot of Amy above when I realized that she came up with another way of handling the squintiness issue: she wore sunglasses! Wearing sunglasses is not always the best solution, because the subject's eyes are hidden which typically makes for a less compelling image. But used in the right situation it can be a viable option when the sun is blazing. You can see the rest of my photos from Ocean Beach here.
Bringing Out Color
 Sometimes things pop out at me as I'm taking a stroll. Often a bold color will hit me. Unfortunately my photos rarely convey the pop the way I remember it. This is where a little post-processing comes in handy.
If you have Lightroom, it's very easy to make a color pop. Go to the Develop module and scroll down to the Color panel. You can see a row of color pips (little boxes) of different colors. By selecting a pip, you can adjust its hue, saturation, and/or luminance.
My case was simple: I just wanted to bump up the yellows, so I selected the yellow pip and increased the saturation.
Other photo editing tools like Photoshop will have different ways to accomplish this and may offer more granularity (you can choose more colors than the eight offered by Lightroom), but I hope you get the general idea. If I got the facts wrong please let me know in the comments section!
Here's the original photograph:
Sometimes things pop out at me as I'm taking a stroll. Often a bold color will hit me. Unfortunately my photos rarely convey the pop the way I remember it. This is where a little post-processing comes in handy.
If you have Lightroom, it's very easy to make a color pop. Go to the Develop module and scroll down to the Color panel. You can see a row of color pips (little boxes) of different colors. By selecting a pip, you can adjust its hue, saturation, and/or luminance.
My case was simple: I just wanted to bump up the yellows, so I selected the yellow pip and increased the saturation.
Other photo editing tools like Photoshop will have different ways to accomplish this and may offer more granularity (you can choose more colors than the eight offered by Lightroom), but I hope you get the general idea. If I got the facts wrong please let me know in the comments section!
Here's the original photograph:
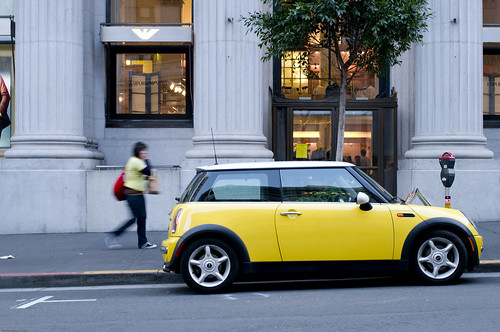
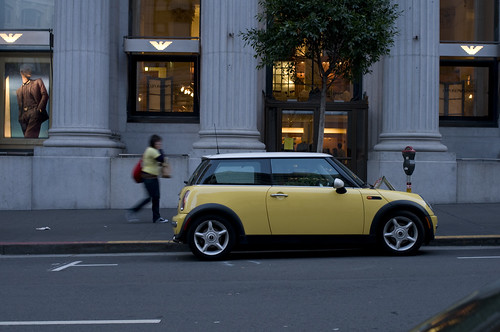 Besides bumping up the yellow, I also increased the exposure, and cropped the photo a little bit.
Next time you need a little extra excitement in your photos, give this a try!
Besides bumping up the yellow, I also increased the exposure, and cropped the photo a little bit.
Next time you need a little extra excitement in your photos, give this a try!Monday, April 13, 2009
Capturing Some Color
I had some spare time after work last month (this rarely happens), so I took a stroll across Chinatown, boarded BART, and finally ended up in the Mission District. My goal was to capture some of the awesome colors that help give San Francisco it's unique character.

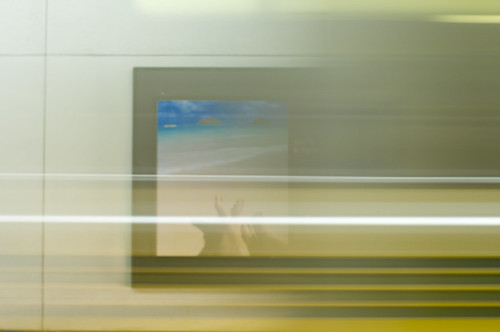


Tilt-Shift Miniature From My Aunt's Condo
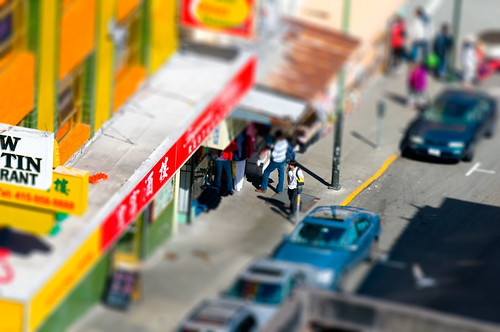 I haven't created a tilt-shift miniature in months, so when I stood at my aunt's balcony overlooking Chinatown in San Francisco, I couldn't help but snap a shot of the busy scene 10+ stories below. The scene was perfect for the tilt-shift miniature treatment because it was colorful and everything look small and toy-like. I'd like to go back to her place soon and do a better job! I'm a bit rusty.
Here's the post from my first attempt at creating tilt-shift miniatures (along with a link on how to do it yourself). Have fun!
I haven't created a tilt-shift miniature in months, so when I stood at my aunt's balcony overlooking Chinatown in San Francisco, I couldn't help but snap a shot of the busy scene 10+ stories below. The scene was perfect for the tilt-shift miniature treatment because it was colorful and everything look small and toy-like. I'd like to go back to her place soon and do a better job! I'm a bit rusty.
Here's the post from my first attempt at creating tilt-shift miniatures (along with a link on how to do it yourself). Have fun!Sunday, April 12, 2009
Lesson Learned: Mind the Squintiness
 Recently I took more save-the-date photos for my friends Burgess and Judy. This time we took it out of the living room and into the real world. The really bright real world! The high afternoon sun cast harsh shadows, and worse, it caused Burgess and Judy to squint.
To avoid this problem in the future, here are some possible solutions:
1. Move them to a shadier spot.
Recently I took more save-the-date photos for my friends Burgess and Judy. This time we took it out of the living room and into the real world. The really bright real world! The high afternoon sun cast harsh shadows, and worse, it caused Burgess and Judy to squint.
To avoid this problem in the future, here are some possible solutions:
1. Move them to a shadier spot.
 2. Have them do something ridiculous, so that the squintiness doesn't matter.
 3. Take a wide shot where they appear small in the photo. Since their faces are small relative to the overall size of the frame, their squintiness is not as noticeable.
4. Bring the shade to them. That's one reason I bought a collapsible translucent disk. I haven't tried it out yet, but I have high hopes that it will help minimize the squintiness. The downside is I need someone to hold it above my subjects, or set up a stand and make sure that it doesn't topple over. Another problem is that while the disk will shield my subjects from direct sunlight, it won't shield them from light bouncing off the ground and nearby walls.
5. Shoot around sunrise or around sunset. Sunrise? Forget about it, too early! Sunset? It's possible, but depends on everyone's schedule.
3. Take a wide shot where they appear small in the photo. Since their faces are small relative to the overall size of the frame, their squintiness is not as noticeable.
4. Bring the shade to them. That's one reason I bought a collapsible translucent disk. I haven't tried it out yet, but I have high hopes that it will help minimize the squintiness. The downside is I need someone to hold it above my subjects, or set up a stand and make sure that it doesn't topple over. Another problem is that while the disk will shield my subjects from direct sunlight, it won't shield them from light bouncing off the ground and nearby walls.
5. Shoot around sunrise or around sunset. Sunrise? Forget about it, too early! Sunset? It's possible, but depends on everyone's schedule.Eight Minute Exposure!!!
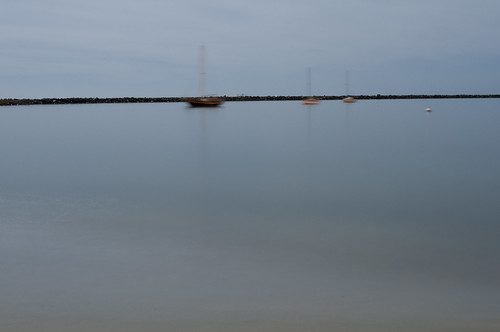 That's right, I made an eight minute exposure while doing some night shooting with my nocturnal pal Brian. What's the point of this post? If I'm going to wait 16 minutes (8 min exposure + 8 min noise reduction) standing on a cold beach at Half Moon Bay waiting for one shot, for the love of God, please make the horizon level. Actually, I kind of like the effect in this case...
You can see the rest of the photos here.
That's right, I made an eight minute exposure while doing some night shooting with my nocturnal pal Brian. What's the point of this post? If I'm going to wait 16 minutes (8 min exposure + 8 min noise reduction) standing on a cold beach at Half Moon Bay waiting for one shot, for the love of God, please make the horizon level. Actually, I kind of like the effect in this case...
You can see the rest of the photos here.Saturday, April 11, 2009
Just Shoot
 About a month ago I was feeling a bit blah about my photographs. I didn't feel like I was improving with each shoot. I needed to switch things up a bit. I wanted to shoot more, but think less. I was becoming so focused on all the little dials on my camera that I was losing sight of the big picture (pun intended).
I decided to take more pictures without fretting too much over the details. I created a set called "10 a day" and wrote this in the set description: "On Friday March 13, 2009, I hereby commit to taking and posting at least 10 photos everyday. It's a great way to shake loose the cobwebs."
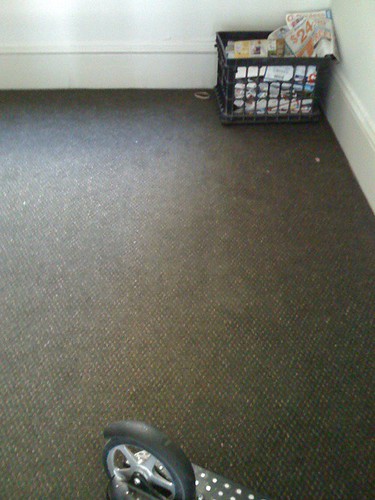
Though I carried my big DSLR everywhere, it usually stayed locked up in my shoulder bag. I only pulled it out for "important" shots, so I told myself that I needed to take 10 photos a day with any photographic device. It turn out that my iPhone filled the role perfectly. It's small and always near at hand. It's simple and "thoughtless" because there are no dials, just point and shoot. With this newfound freedom, I decided to focus more on my composition. Specifically I wanted to compose my shots in totally new ways, such as focusing on the negative space.
About a month ago I was feeling a bit blah about my photographs. I didn't feel like I was improving with each shoot. I needed to switch things up a bit. I wanted to shoot more, but think less. I was becoming so focused on all the little dials on my camera that I was losing sight of the big picture (pun intended).
I decided to take more pictures without fretting too much over the details. I created a set called "10 a day" and wrote this in the set description: "On Friday March 13, 2009, I hereby commit to taking and posting at least 10 photos everyday. It's a great way to shake loose the cobwebs."
Though I carried my big DSLR everywhere, it usually stayed locked up in my shoulder bag. I only pulled it out for "important" shots, so I told myself that I needed to take 10 photos a day with any photographic device. It turn out that my iPhone filled the role perfectly. It's small and always near at hand. It's simple and "thoughtless" because there are no dials, just point and shoot. With this newfound freedom, I decided to focus more on my composition. Specifically I wanted to compose my shots in totally new ways, such as focusing on the negative space.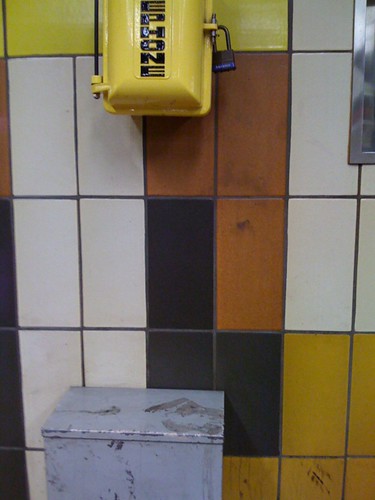


Subscribe to:
Posts (Atom)

