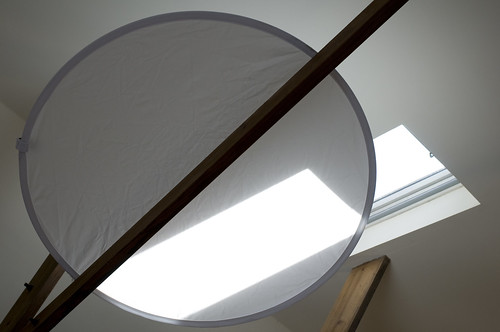
 I just bought a 42" translucent disk with a 4-sided cover (gold, silver, white, and black). I was hoping to take it out and snap some test shots of Amy using all five surfaces. Instead, Amy was watching Diary of a Foodie and wanted me to get rid of the glare on the television caused by the afternoon sun. Sadly my first experience with the disk had nothing to do with photography. Looking back, I should have taken a shot of the television, so that I could have at least said that my disk served a "photographic" purpose.
Monday, March 30, 2009
Waste of a Reflector
I just bought a 42" translucent disk with a 4-sided cover (gold, silver, white, and black). I was hoping to take it out and snap some test shots of Amy using all five surfaces. Instead, Amy was watching Diary of a Foodie and wanted me to get rid of the glare on the television caused by the afternoon sun. Sadly my first experience with the disk had nothing to do with photography. Looking back, I should have taken a shot of the television, so that I could have at least said that my disk served a "photographic" purpose.Sunday, March 29, 2009
Lesson Learned: Mind the Camera Shake
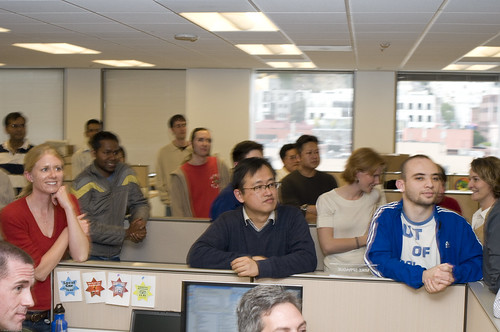
Last month, my buddy Mark looked at the photos I took at my company karaoke contest and mentioned that most of them exhibited a weird flash ghosting effect.
 It's kind of hard to see, but you'll notice it if you magnify it or look at it on a large screen (look at the top of her right hand).
The culprit was camera shake. Camera shake occurs when the camera moves while the shutter is open. Your photos will appear blurry. This typically happens when a camera is handheld and the exposure time is too long. What's too long? Of course there's a handy rule of thumb...
Rule of thumb for avoiding camera shake: select an exposure time with a denominator that is larger than the effective focal length of the lens. In my case, my lens has an effective focal length of 52.5mm (35mm lens on a 1.5x cropped sensor), so any exposure time of 1/60 sec or less should be fast enough. 1/80, 1/100, or 1/250 sec and beyond are fine, but 1/40, 1/20, or 1/10 or slower will cause blur. By the way, for the rest of this post, I will use the term "shutter speed" and "exposure time" interchangeably. I prefer "exposure time", because the units are in seconds, which is a unit of time, not speed.
In the photo above, my shutter speed was 1/80 sec, which should have been fast enough to avoid camera shake according to the rule of thumb. Unfortunately I still got some blur, because my hands are naturally shaky. It also didn't help that I was squatting uncomfortably and my arm was tired.
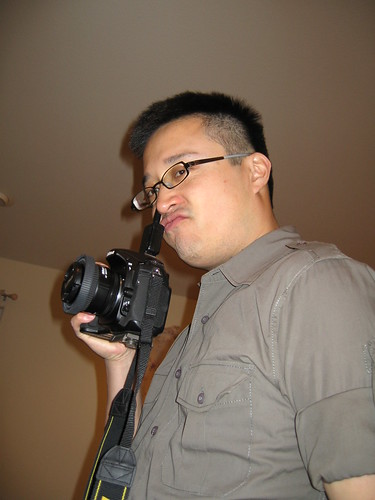
I did a little test a few days later to see if I could induce camera shake with an exposure time of 1/50 sec. On the left, I tried to hold the camera as still as possible. As you can see, the image is not blurry. On the right, I held the camera and simulated a violent sneeze just as I squeezed the shutter release button. The image is very blurry.
It's kind of hard to see, but you'll notice it if you magnify it or look at it on a large screen (look at the top of her right hand).
The culprit was camera shake. Camera shake occurs when the camera moves while the shutter is open. Your photos will appear blurry. This typically happens when a camera is handheld and the exposure time is too long. What's too long? Of course there's a handy rule of thumb...
Rule of thumb for avoiding camera shake: select an exposure time with a denominator that is larger than the effective focal length of the lens. In my case, my lens has an effective focal length of 52.5mm (35mm lens on a 1.5x cropped sensor), so any exposure time of 1/60 sec or less should be fast enough. 1/80, 1/100, or 1/250 sec and beyond are fine, but 1/40, 1/20, or 1/10 or slower will cause blur. By the way, for the rest of this post, I will use the term "shutter speed" and "exposure time" interchangeably. I prefer "exposure time", because the units are in seconds, which is a unit of time, not speed.
In the photo above, my shutter speed was 1/80 sec, which should have been fast enough to avoid camera shake according to the rule of thumb. Unfortunately I still got some blur, because my hands are naturally shaky. It also didn't help that I was squatting uncomfortably and my arm was tired.
I did a little test a few days later to see if I could induce camera shake with an exposure time of 1/50 sec. On the left, I tried to hold the camera as still as possible. As you can see, the image is not blurry. On the right, I held the camera and simulated a violent sneeze just as I squeezed the shutter release button. The image is very blurry.
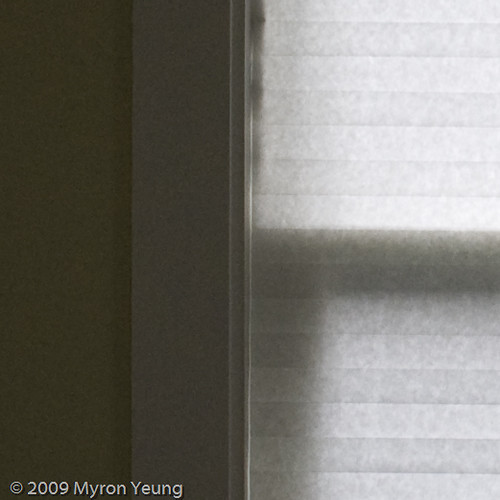 No blur
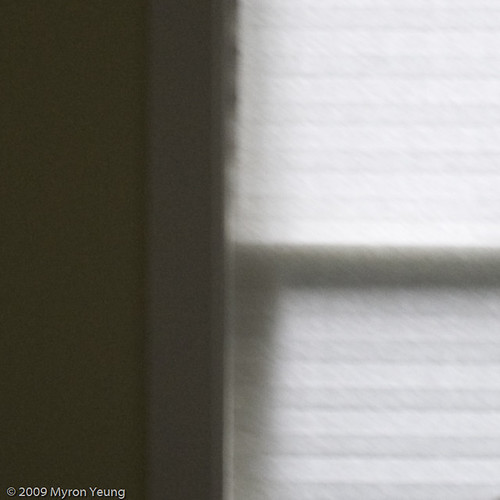 Blurry
Though I wasn't sneezing violently during the karaoke contest, what I proved to myself in the test above is that I need to be aware of what my hands, body, and camera are doing when my exposure time approaches the rule of thumb.
Here's how to avoid camera shake:
1. Choose a shutter speed that is fast enough for the effective focal length of your lens. In my case, just to be safe, since my hands are naturally shaky, I should choose a speed twice as fast as the inverse of my effective focal length. And/or...
2. Brace yourself and/or...
3. Brace your camera on a tripod, monopod, or a stable surface (like a desk) and/or
4. Shoot at the continuous shutter release setting, so your camera doesn't move each time you squeeze the shutter release button. Your first and last shots will be blurry, but the shots in between should be sharper.
By following one or more of these rules, not only will you avoid camera shake, but you can also shoot people at much longer exposure times which can create pleasant types of blurring. By keeping my camera still, I managed to keep his face relatively sharp, but his hands blurry:
Blurry
Though I wasn't sneezing violently during the karaoke contest, what I proved to myself in the test above is that I need to be aware of what my hands, body, and camera are doing when my exposure time approaches the rule of thumb.
Here's how to avoid camera shake:
1. Choose a shutter speed that is fast enough for the effective focal length of your lens. In my case, just to be safe, since my hands are naturally shaky, I should choose a speed twice as fast as the inverse of my effective focal length. And/or...
2. Brace yourself and/or...
3. Brace your camera on a tripod, monopod, or a stable surface (like a desk) and/or
4. Shoot at the continuous shutter release setting, so your camera doesn't move each time you squeeze the shutter release button. Your first and last shots will be blurry, but the shots in between should be sharper.
By following one or more of these rules, not only will you avoid camera shake, but you can also shoot people at much longer exposure times which can create pleasant types of blurring. By keeping my camera still, I managed to keep his face relatively sharp, but his hands blurry:
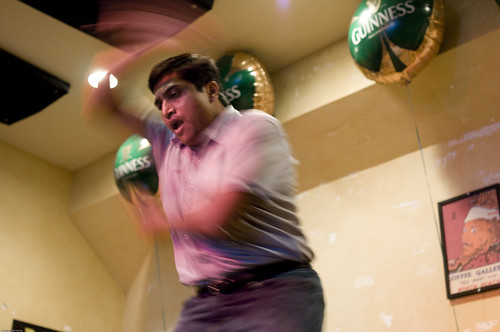 Sometimes camera shake can produce a neat effect:
 But I digress. Bottom line: camera shake is bad, so try to minimize it.
It's kind of hard to see, but you'll notice it if you magnify it or look at it on a large screen (look at the top of her right hand).
The culprit was camera shake. Camera shake occurs when the camera moves while the shutter is open. Your photos will appear blurry. This typically happens when a camera is handheld and the exposure time is too long. What's too long? Of course there's a handy rule of thumb...
Rule of thumb for avoiding camera shake: select an exposure time with a denominator that is larger than the effective focal length of the lens. In my case, my lens has an effective focal length of 52.5mm (35mm lens on a 1.5x cropped sensor), so any exposure time of 1/60 sec or less should be fast enough. 1/80, 1/100, or 1/250 sec and beyond are fine, but 1/40, 1/20, or 1/10 or slower will cause blur. By the way, for the rest of this post, I will use the term "shutter speed" and "exposure time" interchangeably. I prefer "exposure time", because the units are in seconds, which is a unit of time, not speed.
In the photo above, my shutter speed was 1/80 sec, which should have been fast enough to avoid camera shake according to the rule of thumb. Unfortunately I still got some blur, because my hands are naturally shaky. It also didn't help that I was squatting uncomfortably and my arm was tired.
I did a little test a few days later to see if I could induce camera shake with an exposure time of 1/50 sec. On the left, I tried to hold the camera as still as possible. As you can see, the image is not blurry. On the right, I held the camera and simulated a violent sneeze just as I squeezed the shutter release button. The image is very blurry.
No blurBlurry
Sometimes camera shake can produce a neat effect:
But I digress. Bottom line: camera shake is bad, so try to minimize it.Monday, March 9, 2009
Lesson Learned: Make It Fun For The Subject
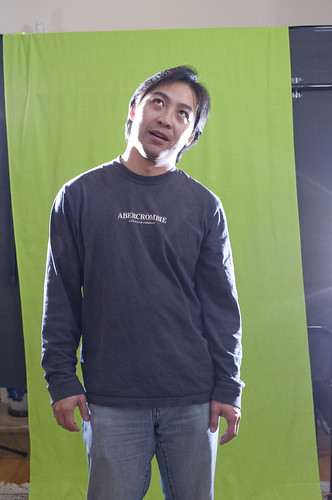
 My recent batch of photos of Amy haven't been great, partly because she didn't want to be in front of the camera, and it showed. So when we hiked up Bernal Heights in San Francisco, I had a plan: I'd get low, aim the camera up and ask her to jump high with the city behind her.
I really liked how they turned out. She was having fun, I was having fun, and the photos reflected it. You can also tell she used to be a cheerleader back in the day!
Finally, in case you're wondering, Amy was not shot in front of a green screen and composited with a photo of San Francisco. I don't always use that trick. ;-)
To see the rest of our jumpy photos, go here.
My recent batch of photos of Amy haven't been great, partly because she didn't want to be in front of the camera, and it showed. So when we hiked up Bernal Heights in San Francisco, I had a plan: I'd get low, aim the camera up and ask her to jump high with the city behind her.
I really liked how they turned out. She was having fun, I was having fun, and the photos reflected it. You can also tell she used to be a cheerleader back in the day!
Finally, in case you're wondering, Amy was not shot in front of a green screen and composited with a photo of San Francisco. I don't always use that trick. ;-)
To see the rest of our jumpy photos, go here.Sunday, March 8, 2009
Fun With Judy and Burgess: Extra Stuff
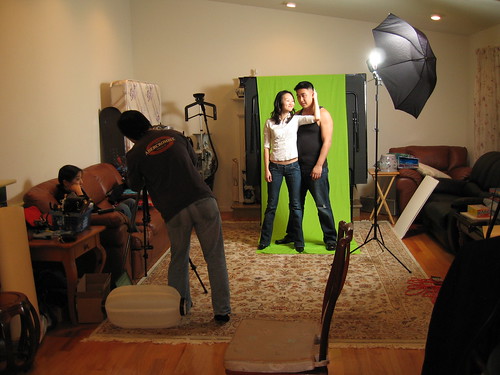
 To end this series of Judy and Burgess posts, I wanted to share some additional photos we took. As you can tell, we had a lot of fun, and basically turned Brian and Burgess's house into a giant studio.

Saturday, March 7, 2009
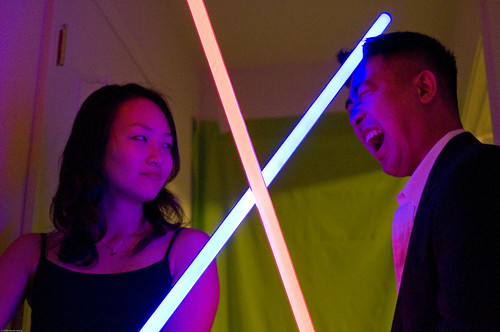
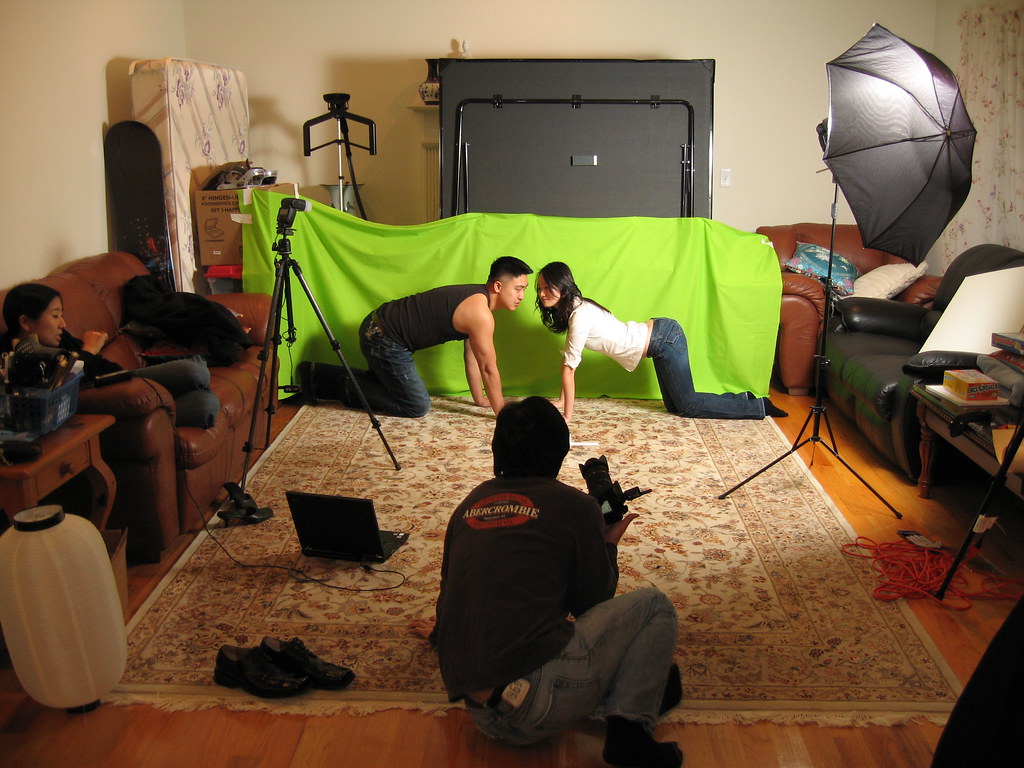
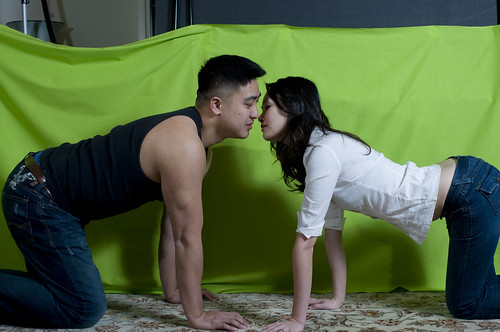
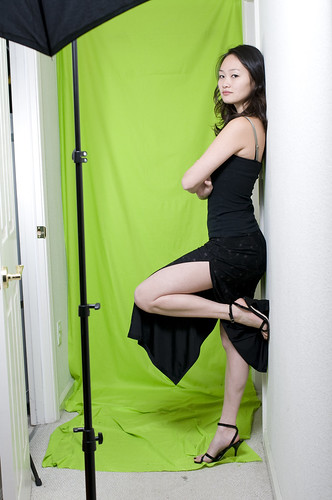
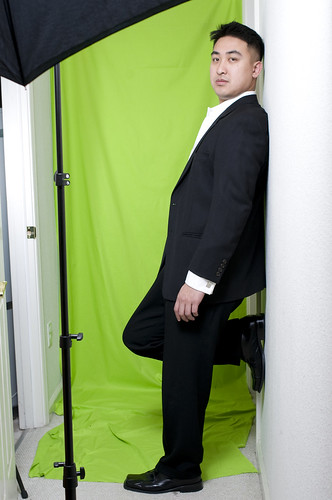
Fun With Judy and Burgess: Dirty Dancing
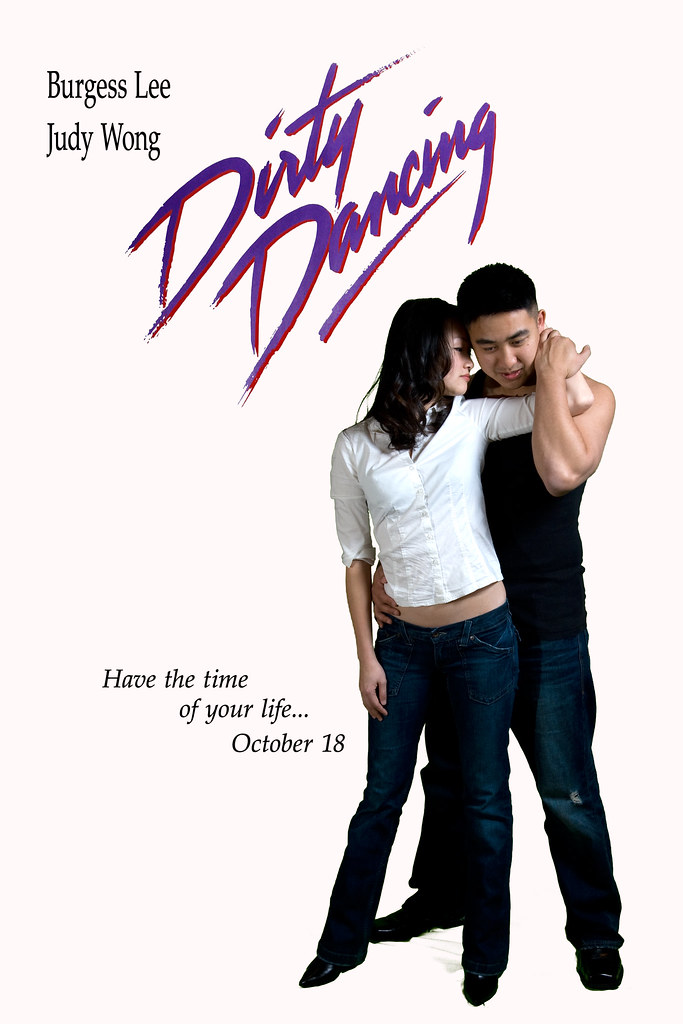 In addition to Twilight and Mr. & Mrs. Smith, Judy and Burgess wanted to do an homage to Dirty Dancing.
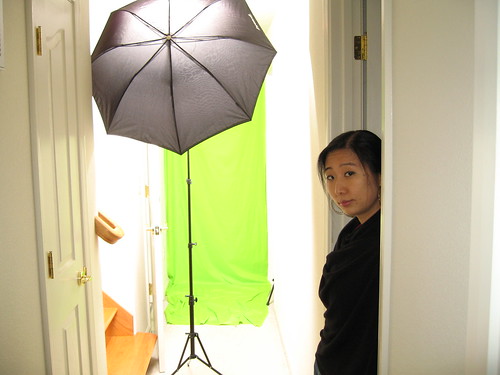
 The setup:
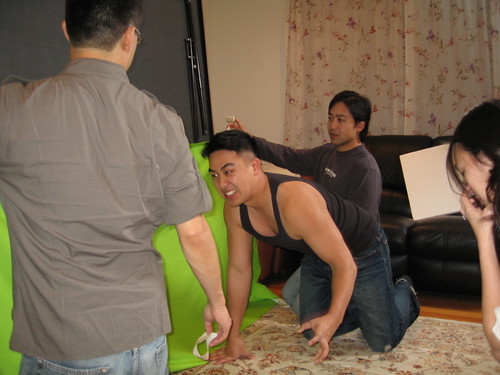
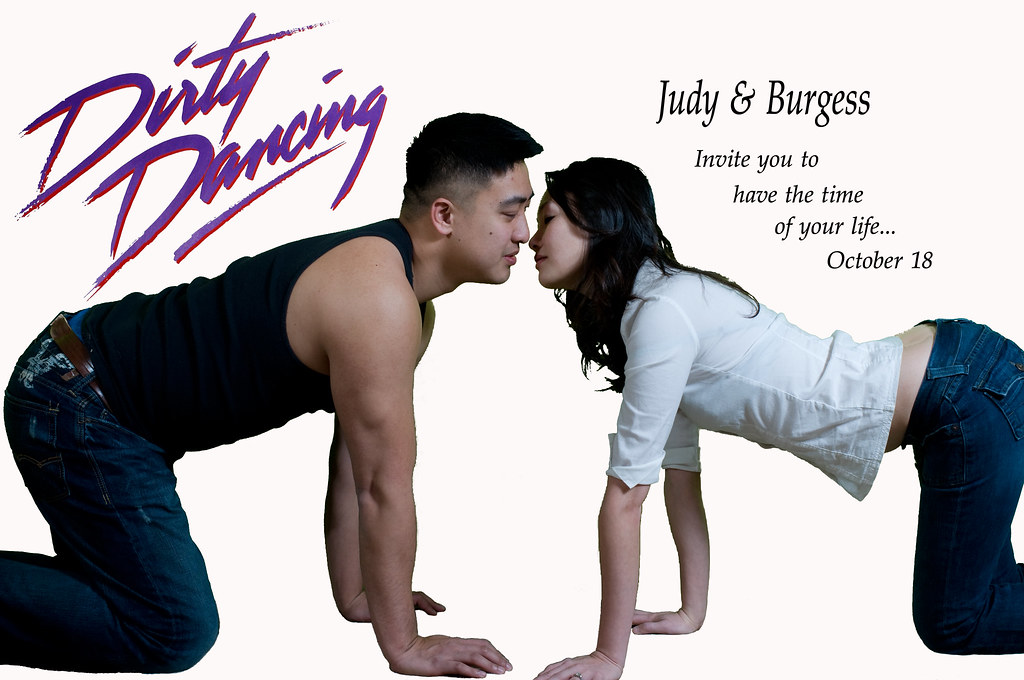
 In both photos, the key light is a flash shot through a reflective umbrella at camera right high above the subjects. A second flash at camera left served as fill light, but I'm not sure if it fired in the photo above. It definitely fired in the bottom photo, because we needed a lot of extra light on Burgess's black tank top.
 Original photos:
Shot by Brian:
Original photos:
Shot by Brian:
 Shot by me:
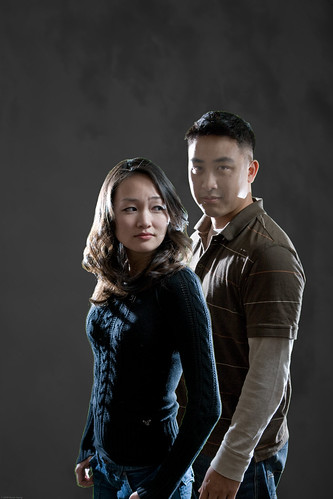
 What I did during post-processing:
Like before, I first removed the background around Judy and Burgess. Having spent two evenings slowly and painfully (carpal tunnel) removing the background with the eraser, lasso, and magic wand tools, I had enough. I felt that Photoshop must have devised a way to quickly remove all pixels that matched a certain color specified by me.
I dug around the internet and found this great article entitled "Keying Out Backgrounds in Photoshop". It's a step-by-step guide on how to use the 'Color Range' tool.
This tool is simply amazing. It turned a three hour task into one that took about a minute! In fact, I was able to remove most of the green from the second photo while riding the bumpy train in the morning! Best of all is that with a little care, I was able to preserve most of Judy's hair!
Of course I still had to employ the other tools to remove the rug around Judy and Burgess's hands and knees. Next time I'm using a bigger green sheet!
What I learned:
The 'Color Range' tool is the best thing since sliced bread!
What I did during post-processing:
Like before, I first removed the background around Judy and Burgess. Having spent two evenings slowly and painfully (carpal tunnel) removing the background with the eraser, lasso, and magic wand tools, I had enough. I felt that Photoshop must have devised a way to quickly remove all pixels that matched a certain color specified by me.
I dug around the internet and found this great article entitled "Keying Out Backgrounds in Photoshop". It's a step-by-step guide on how to use the 'Color Range' tool.
This tool is simply amazing. It turned a three hour task into one that took about a minute! In fact, I was able to remove most of the green from the second photo while riding the bumpy train in the morning! Best of all is that with a little care, I was able to preserve most of Judy's hair!
Of course I still had to employ the other tools to remove the rug around Judy and Burgess's hands and knees. Next time I'm using a bigger green sheet!
What I learned:
The 'Color Range' tool is the best thing since sliced bread!Friday, March 6, 2009
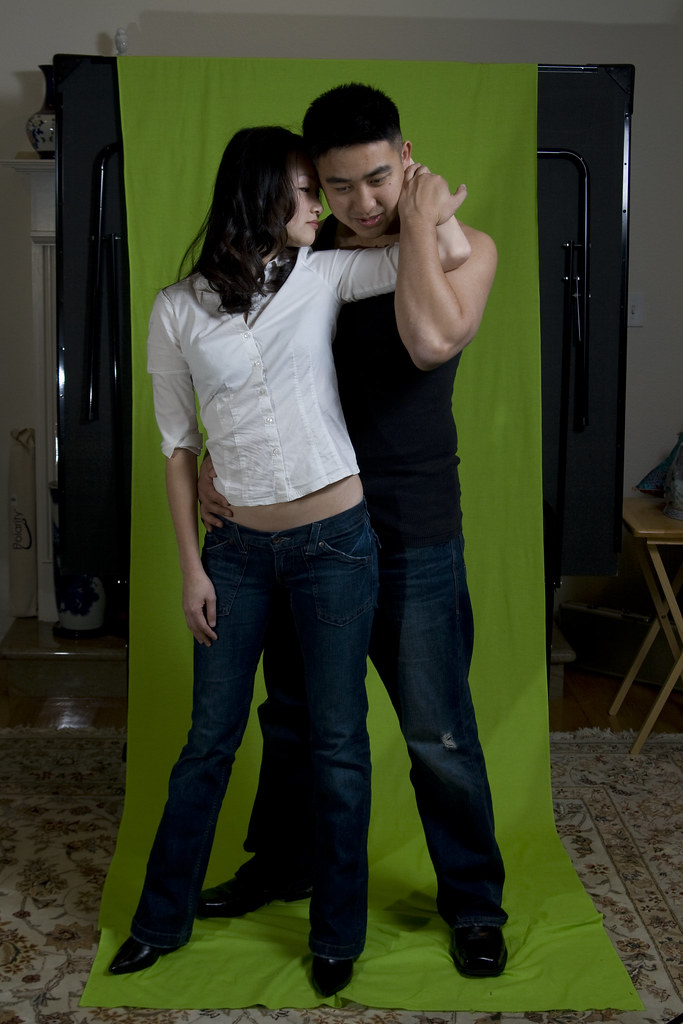
Fun With Judy and Burgess: Mr. & Mrs. Smith
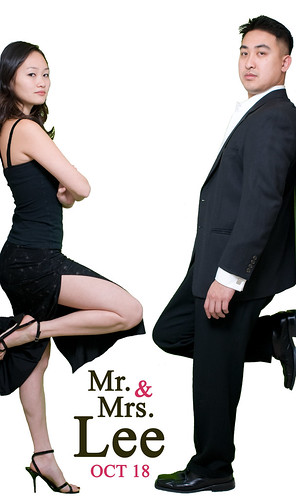 After we finished shooting the faux Twilight and Dirty Dancing (to be discussed next time) posters of Judy and Burgess, we shot an homage to Mr. & Mrs. Smith.
The setup:
After we finished shooting the faux Twilight and Dirty Dancing (to be discussed next time) posters of Judy and Burgess, we shot an homage to Mr. & Mrs. Smith.
The setup:
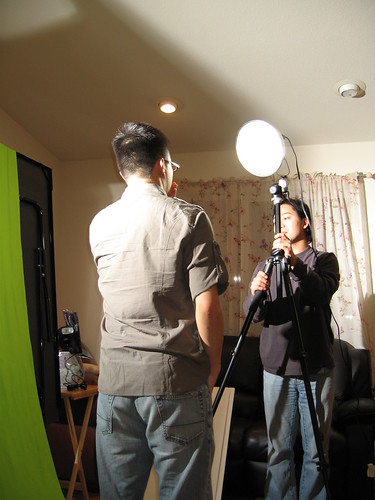
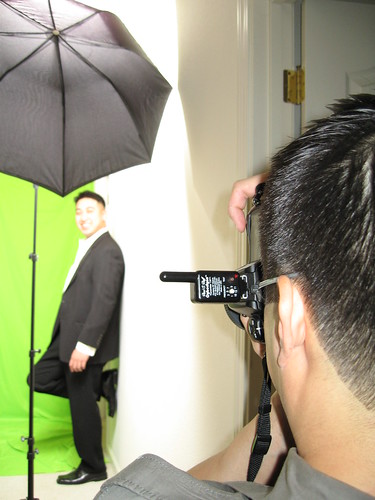
 We found a narrow hallway in the house that was perfect. We taped the green background to the back door. To evenly light the background, Brian pointed a flash at it and put the flash in the doorway of the room on the right behind Judy and Burgess. The key light was a second flash bounced off of an umbrella. In such a confined space, the flash basically lit everything evenly.
Original shot of Judy:
We found a narrow hallway in the house that was perfect. We taped the green background to the back door. To evenly light the background, Brian pointed a flash at it and put the flash in the doorway of the room on the right behind Judy and Burgess. The key light was a second flash bounced off of an umbrella. In such a confined space, the flash basically lit everything evenly.
Original shot of Judy:
 Original shot of Burgess:
 What I learned:
Just because I have something shiny and new to play with, doesn't mean I should use it. Case in point: If the final image has a white background, why the heck did I put up the green sheet? Post-processing would have been a lot simpler had I just shot them against the white door! Sheesh!
What I learned:
Just because I have something shiny and new to play with, doesn't mean I should use it. Case in point: If the final image has a white background, why the heck did I put up the green sheet? Post-processing would have been a lot simpler had I just shot them against the white door! Sheesh!Thursday, March 5, 2009
Fun With Judy and Burgess: Twilight
 Over a month ago, I wrote about a top secret experiment my buddy Brian and I conducted. Then a few weeks ago, I wrote about buying some green fabric and using it to create a crude composite of myself and Amy.
What were we up to? We were preparing for a shoot with Brian's brother Burgess and his fiancee Judy. They recently got engaged and wanted a photo for their save-the-date card. Brian and I smelled an opportunity to try out some new things and have some fun. We wanted to replicate a Twilight poster created by
Over a month ago, I wrote about a top secret experiment my buddy Brian and I conducted. Then a few weeks ago, I wrote about buying some green fabric and using it to create a crude composite of myself and Amy.
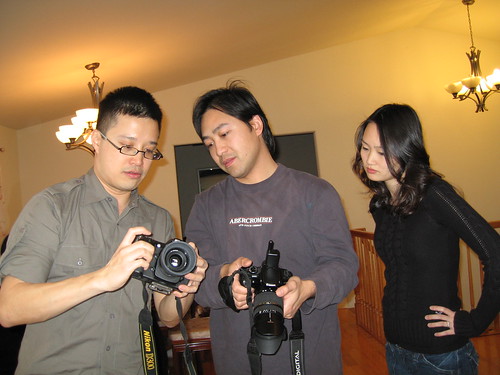
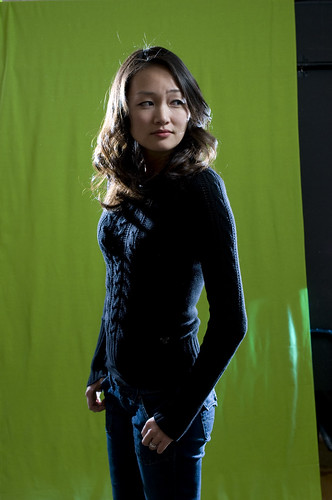
What were we up to? We were preparing for a shoot with Brian's brother Burgess and his fiancee Judy. They recently got engaged and wanted a photo for their save-the-date card. Brian and I smelled an opportunity to try out some new things and have some fun. We wanted to replicate a Twilight poster created by 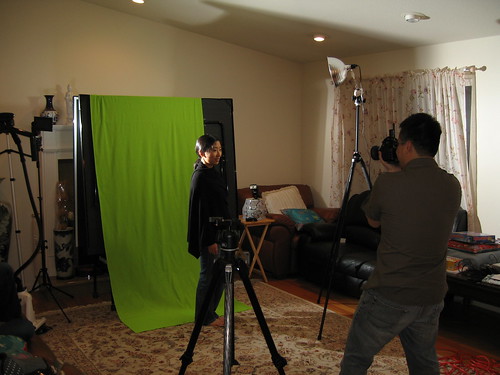 Amy stood in for Judy and Burgess as Brian and I set up the lights. There are two flashes acting as rim lights. One at back camera left, about six feet high, and goboed to prevent spill. The second at back camera right and about three feet high (we didn't have a second stand). The key light was a Home Depot work light with a sunlight-balanced compact fluorescent lamp (CFL) at 4:00 camera right and seven feet off the ground. We angled the work light up a little bit to reduce shadows appearing on the background.
Original shot of Judy:
Amy stood in for Judy and Burgess as Brian and I set up the lights. There are two flashes acting as rim lights. One at back camera left, about six feet high, and goboed to prevent spill. The second at back camera right and about three feet high (we didn't have a second stand). The key light was a Home Depot work light with a sunlight-balanced compact fluorescent lamp (CFL) at 4:00 camera right and seven feet off the ground. We angled the work light up a little bit to reduce shadows appearing on the background.
Original shot of Judy:
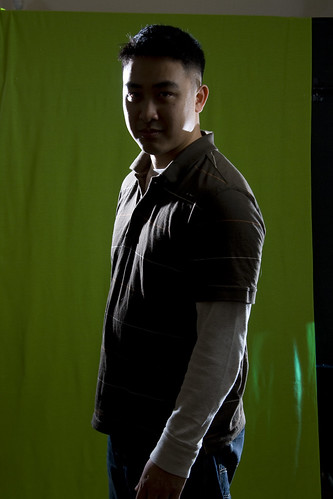
 Original photo of Burgess shot by Brian:
 The background was a photo of the sky I shot earlier in the evening:
 What I did during post-processing:
I don't remember all the details, but I do know the broad points.
In Lightroom:
1. I played with the exposure and fill light of Judy and Burgess's photos.
2. I also reduced the vibrance and saturation levels to give them a ghoulish look, I reduced the levels more on Burgess's photo, because he's supposed to be the vampire.
3. I darkened the background photo in Lightroom.
4. I exported all three images as Photoshop files.
In Photoshop:
1. I removed everything around Judy and Burgess.
2. I rotated the background photo from landscape to portrait.
3. I created a new file and to it I added all three images as individual layers. Now that I saw how the three layers looked together, I made more adjustments. I played with the exposure of each layer. I remember darkening the sky a bit more. Burgess's face was still underexposed, so I lightened it with the dodge tool.
4. Lastly, I moved Judy and Burgess around until they looked right. They were taken by me and Brian respectively and our angle and distance relative to the subject varied quite a bit. As a result, I also had to resize Judy.
If you want to learn more about how to use Photoshop to do what I described above, check out this post.
What I learned:
1. Use a flash as the key light, because the task light cast very little light on the subject. Use the task light as a rim light instead.
2. The more evenly I light the background, the easier it is to remove it during post-processing. As I mentioned earlier, we angled the key light to reduce the shadows thrown by our subjects, which helped out a lot.
3. Combine all three images into Photoshop before removing the backgrounds. It's easier that way.
4. It takes forever isolating the subjects using the eraser tool, especially their hair! There must be a better way. There is! Stay tuned...
Brian snuck in a shot of Amy and me! Good times.
What I did during post-processing:
I don't remember all the details, but I do know the broad points.
In Lightroom:
1. I played with the exposure and fill light of Judy and Burgess's photos.
2. I also reduced the vibrance and saturation levels to give them a ghoulish look, I reduced the levels more on Burgess's photo, because he's supposed to be the vampire.
3. I darkened the background photo in Lightroom.
4. I exported all three images as Photoshop files.
In Photoshop:
1. I removed everything around Judy and Burgess.
2. I rotated the background photo from landscape to portrait.
3. I created a new file and to it I added all three images as individual layers. Now that I saw how the three layers looked together, I made more adjustments. I played with the exposure of each layer. I remember darkening the sky a bit more. Burgess's face was still underexposed, so I lightened it with the dodge tool.
4. Lastly, I moved Judy and Burgess around until they looked right. They were taken by me and Brian respectively and our angle and distance relative to the subject varied quite a bit. As a result, I also had to resize Judy.
If you want to learn more about how to use Photoshop to do what I described above, check out this post.
What I learned:
1. Use a flash as the key light, because the task light cast very little light on the subject. Use the task light as a rim light instead.
2. The more evenly I light the background, the easier it is to remove it during post-processing. As I mentioned earlier, we angled the key light to reduce the shadows thrown by our subjects, which helped out a lot.
3. Combine all three images into Photoshop before removing the backgrounds. It's easier that way.
4. It takes forever isolating the subjects using the eraser tool, especially their hair! There must be a better way. There is! Stay tuned...
Brian snuck in a shot of Amy and me! Good times.
 We ended up shooting other faux movie posters starring Judy and Burgess. More to come in the days ahead!
Subscribe to:
Posts (Atom)

