Over a month ago, I wrote about a
top secret experiment my buddy Brian and I conducted. Then a few weeks ago, I wrote about buying some
green fabric and using it to create a crude composite of myself and Amy.
What were we up to? We were preparing for a shoot with Brian's brother Burgess and his fiancee Judy. They recently got engaged and wanted a photo for their save-the-date card. Brian and I smelled an opportunity to try out some new things and have some fun. We wanted to replicate a
Twilight poster created by
Joey L.
We got many helpful hints from reading
Zach Hodges's Twilight Christmas cards
blog post, like how using a black background was a bad idea, because it's very difficult to isolate the subjects against a dark background during post-processing. This was the reason I bought the green fabric.
The setup:
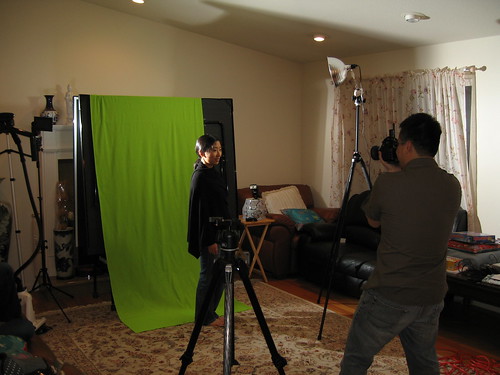
Amy stood in for Judy and Burgess as Brian and I set up the lights. There are two flashes acting as rim lights. One at back camera left, about six feet high, and goboed to prevent spill. The second at back camera right and about three feet high (we didn't have a second stand). The key light was a Home Depot work light with a sunlight-balanced compact fluorescent lamp (CFL) at 4:00 camera right and seven feet off the ground. We angled the work light up a little bit to reduce shadows appearing on the background.
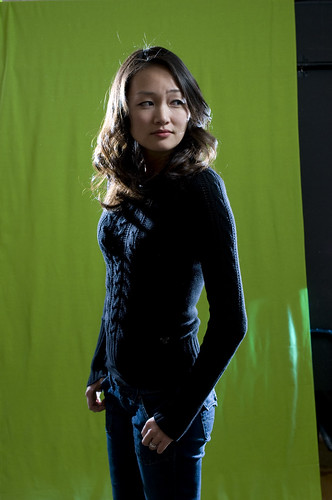
Original shot of Judy:
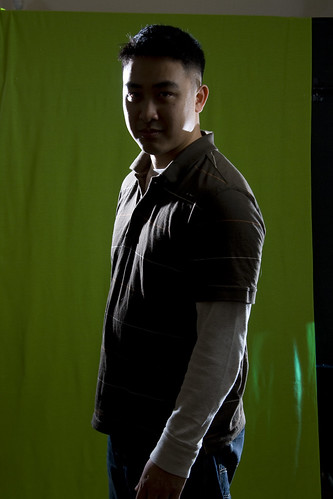
 Original photo of Burgess shot by Brian:
 The background was a photo of the sky I shot earlier in the evening:
 What I did during post-processing:
I don't remember all the details, but I do know the broad points.
In Lightroom:
1. I played with the exposure and fill light of Judy and Burgess's photos.
2. I also reduced the vibrance and saturation levels to give them a ghoulish look, I reduced the levels more on Burgess's photo, because he's supposed to be the vampire.
3. I darkened the background photo in Lightroom.
4. I exported all three images as Photoshop files.
In Photoshop:
1. I removed everything around Judy and Burgess.
2. I rotated the background photo from landscape to portrait.
3. I created a new file and to it I added all three images as individual layers. Now that I saw how the three layers looked together, I made more adjustments. I played with the exposure of each layer. I remember darkening the sky a bit more. Burgess's face was still underexposed, so I lightened it with the dodge tool.
4. Lastly, I moved Judy and Burgess around until they looked right. They were taken by me and Brian respectively and our angle and distance relative to the subject varied quite a bit. As a result, I also had to resize Judy.
If you want to learn more about how to use Photoshop to do what I described above, check out this
post.
What I learned:
1. Use a flash as the key light, because the task light cast very little light on the subject. Use the task light as a rim light instead.
2. The more evenly I light the background, the easier it is to remove it during post-processing. As I mentioned earlier, we angled the key light to reduce the shadows thrown by our subjects, which helped out a lot.
3. Combine all three images into Photoshop before removing the backgrounds. It's easier that way.
4. It takes forever isolating the subjects using the eraser tool, especially their hair! There must be a better way. There is! Stay tuned...
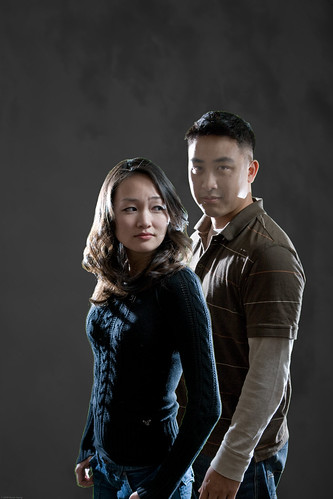
Brian snuck in a shot of Amy and me! Good times.

We ended up shooting other faux movie posters starring Judy and Burgess. More to come in the days ahead!


No comments:
Post a Comment